Saturday, 23 December 2017

RPO Part 3

These CN RPO's feature an Arch Style roof with rounded ends.  An Athearn 70' Round Roof Coach was sacrificed to provide the roof.

First the roof was separated just below the upper rivet strip using a large razor Saw.


Next I scraped and sanded the roof even with the rivet strip.

It was determined that this point the roof was too wide to mate with the RPO body.  I calculated the point at which the roof narrows along the arch profile where it would be the correct width.  I used my height gage and scribed a line around the roof at this point.


Then I used a small modelling plane and my plexiglass mounted sandpaper to remove this material.


I now had an Arch roof of the correct profile and width to match the car.

The forth step was to shorten the roof to the correct length.  A razor saw and miter box were used to cut out a section from the middle of the roof.  I then used my milling machine to end mill the roof sections to the correct length to match the RPO body.   These were glued together using Testor's model cement, as it has a slow cure time compared to MEK.  I used my machined gluing jig to keep things lined up.


The final step was to reinforce the joint from the inside with some sheet styrene.


Next steps will be to detail the roof correct for the 7810-7812 series RPOs.

Monday, 11 December 2017

RPO Part 2

Over the weekend I made substantial progress on the RPO.

I scratch built new sides from Evergreen styrene sheet and strip.  Commercial sized strip was used to keep things simple.

In the first photo you will see some finger clamps I constructed to assist in the process of making the sides. I saw these over on Joe Smith's Blog and thought they were just great.  Mine are made of mild steel with a piece of Tig welding wire pressed into a drilled hole.  They are basically a mini finger to hold things while your gluing etc.  What great idea and now that I have them, I can't live without them!!  Construction is done on plate glass set against a metal scale.

The first layer is made of a piece of 0.010" thick material with 0.060" quarter round on either end. The second layer is all made from 0.010" strip of varying widths.  A piece of 0.100" and 0.080" strip is attached along the top and bottom of the sides respectively.  The top and bottom of the three doors are made with 0.080" strip centered on the pencil lines.  These are made longer than actually needed.


Here is a close up of the side as described above.  The strips are set 0.010" off of the top and bottom strips to leave room for upper and lower door sills.  The top of the side is against the scale in this photo.


Next I applied the mutton's to the upper half of the door to frame door window openings.  The mutton's are 0.040" styrene and the outer edge is 0.080" which will be covered with a 0.040" quarter round door jamb that will leave a 0.040" door boarder to match the mutton size.


Here is both sides with the doors and windows all framed up.


Next the remaining areas were filled with 0.010" sheet to complete this layer.


The third layer starts by adding 0.040" sheet on top of the second layer using individual pieces followed up with 0.010" x 0.040" strip set vertically at the top and bottom of the door openings.
Unfortunately I didn't take a close up photo. Finally I added the 0.040" quarter round on either side of the door to form the door jamb.


Next up is to cut out the window and door window openings, followed by adding the belt rail and letter board using 0.010" strip.  I will fill any seams with putty and sand if needed before mounting on the car floor.


Friday, 8 December 2017

Railway Post Office Service on the Grand Trunk NEL

The Grand Trunk (NEL) rostered  three Railway Post office Cars #'s 7810-7812.  They were built by ACF in 1929, possibly for subsidiary GTW and transferred at a later date.

The Canadian National Historical Society magazine CN lines Volume 9 Issue 1 has a article pertaining to these cars and similar RPO's used on the Central Vermont and Grand Trunk Western.  Here is a picture found in Morning's Sun Colour Guide to Northern New England Cars.


I am going to kitbash one of these cars using a Branchline Coach as the base model.

I recently discovered Joe Smith's Blog "Signal Station 199" regarding his efforts in building a New Haven themed layout. He has a set of blog entries showing his techniques to kitbash a similar RPO for the New Haven.  Go take a look, but I warn you Joe's modelling and blog are top notch so your  going to be there for a while.  Here's the link...

https://signalstation199.blogspot.ca/search/label/RPO

Now that your back, here's where I'm at with this project. Follow along as I put what I learned from Joe to good use.

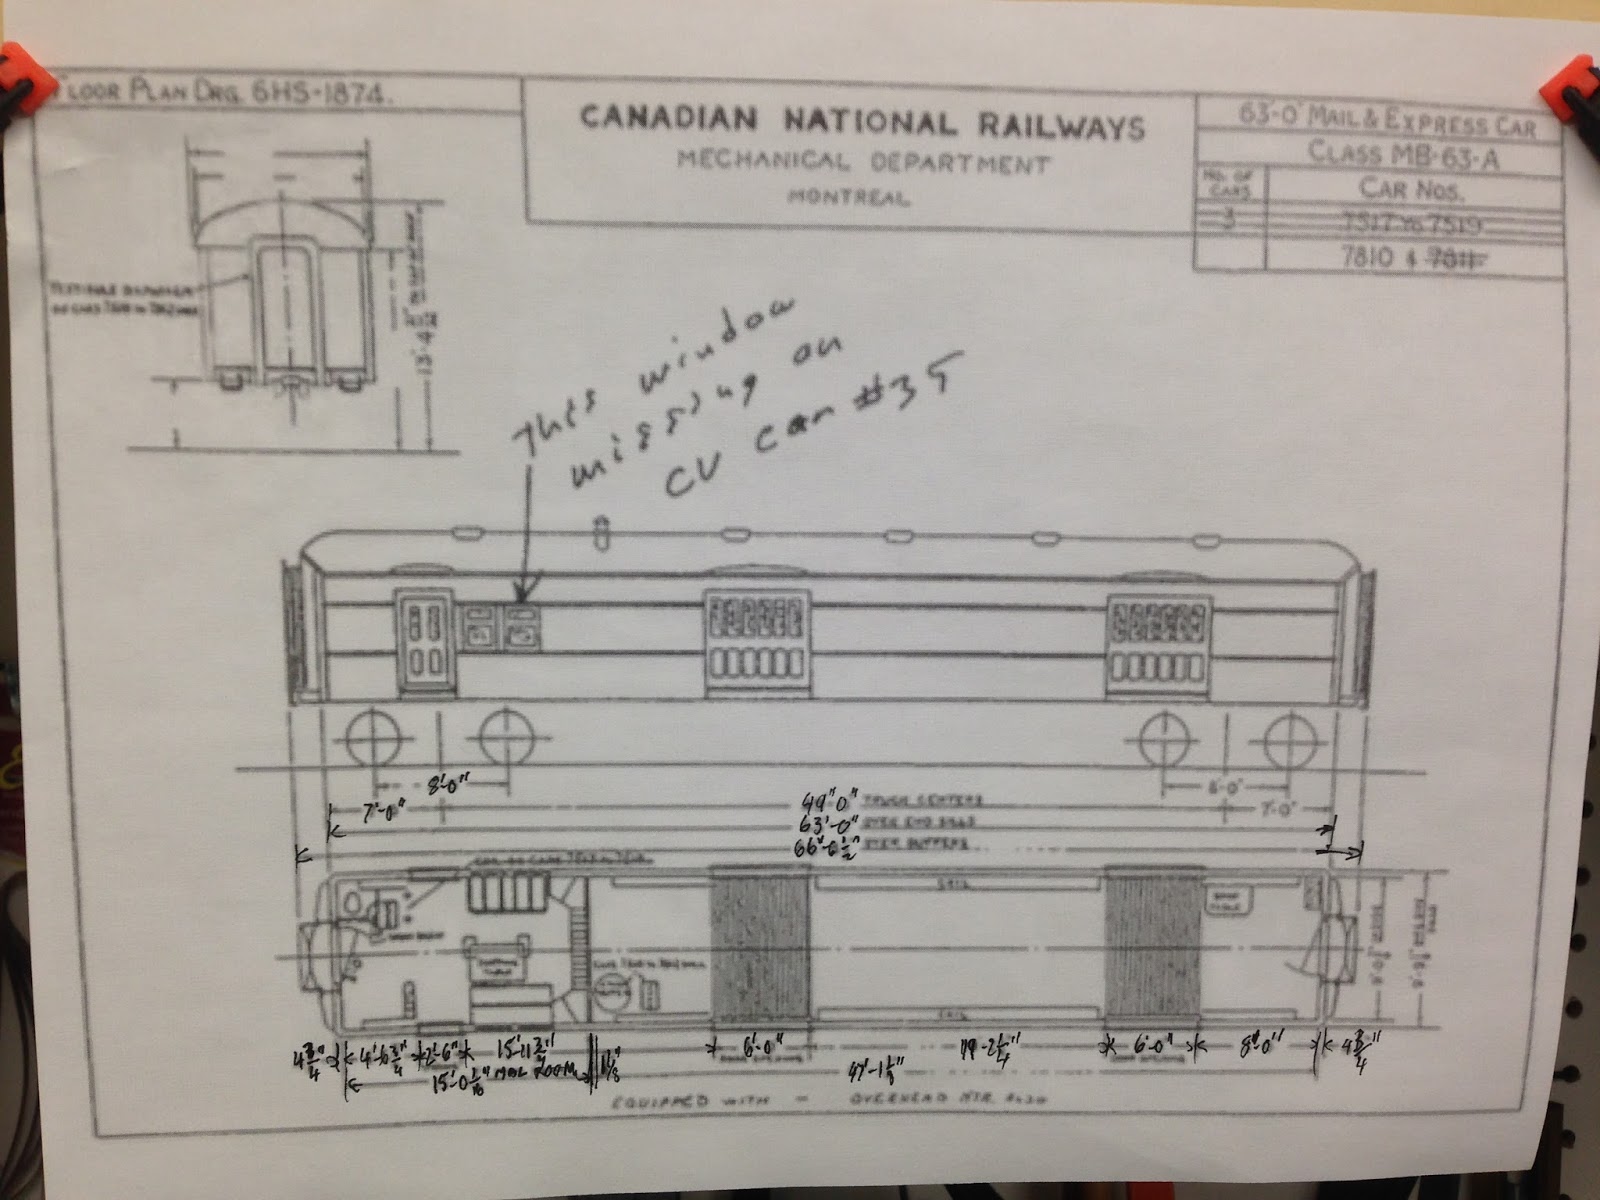
First off I enlarged a drawing provided in the CN lines issue and copied the dimensions over from the soft copy, that were blurry when enlarged.


Next I cut the floor and spliced it back together to give an length over the couplers of 66' - 61/2".

The floor is braced with a sheet of styrene and some square stock.


The second photo shows the floor sections I removed.  I also removed the side vestibule doors and walls on either side of the end doors.


Friday, 29 September 2017

Grand Trunk 25 Ton American Ohio Model E Crane

The Grand Trunk(NEL) had at least one 25 ton locomotive crane that I know of.  It spent most of its time in Island Pond moving coal around.  For my work Train I wanted to include a crane as part of the consist.  So I kit bashed this model using the one and only picture of the crane stationed in Island Pond as reference.  The picture can be found in the John Ames Grand Trunk Trackside book published by Morning Sun.  I believe the prototype to be an American Ohio model E.

The model uses a Walthers 25ton crane for the mechanism and deck.  The rest of the kit is in the trash  bin.  I scratch built the Cab from Sheet styrene.  The Smoke box was made from acrylic turned on my jewellers lathe.  The boom is a brass etching from Custom Finishing Models, and hook is a pewter casting from the same manufacturer.  I made all the pulleys from brass tube and washers.  All the brass parts are soldered.


The big challenge with this project was the windows.  On the prototype they are fine metal bars with glass inserted and have 9 or more panes.   I tried and failed a few times before I came up with a solution I liked.  

I designed the windows in Draftsight and then printed them on overhead transparencies using my laser printer.  This captured the fine look of the mutens on the prototype.


This was a fun project and much different than the endless string of Boxcars I have been working on. Now that the fun is over, its back to more Boxcars!!  


Weathered Boxcars

  Here are some pictures of my latest efforts.  I pulled out the weathering supplies and finished off a few projects that have been built, but not weathered.  Other than the Grant Trunk Tool car these cars are projects which I started in the spring but only recently finished.

  They are all weathered with MIG products washes and Pan Pastels, except the BAR car which just got an India ink Alcohol wash and some artists oils (I scratched the paint. So I  added a rust spot to cover it up.)

  In the pictures the cars all look glossier than they appear to the eye.  I need to work on my lighting a bit more to get the dusty look of the models to show up.

First up the Grand Trunk Tool Car. 


Next is a P&LE Steel Side Rebuilt Boxcar based on the Tichy kit, with many upgrades including but not limited to doors and decals from Speedwitch media.  I went heavy with the weathering on this car as it would be nearing the end of its life for my future Grand Trunk(NEL) layout time frame.


Third is a EJ&E car.  This is a Branchline Car kit bash.  It's based on an Article from the August 2013 issue of RMC.  Decals are from Tichy.


Finally a BAR PS-1 using the Intermountain kit and Highball Graphics Decals. 


Friday, 15 September 2017

Grand Trunk Tool Car part 2

I made good progress on the Grand Trunk Tool car this week.  Its now painted and the decals are done.  I used True Colour CN Freight Car Red.  The decals are pieced together from and old Steam Shack Kit for a Central Vermont Single Sheathed Boxcar, which also had GTW decals included - the rest are cobbled together from a Microscale lettering set.  In my previous post I forgot to mention I removed the sill from the window to the right of the door to better simulate the flush frame as on the prototype.  The car needs weathering and brake line hoses, but I will hold off on the weathering until I get the MoW train complete as I plan to weather them all at the same time.


The Picture was taken in my new Photo Box.  My son and I put this together last weekend.   Its based on an article found in the April 2017 issue of Railroad Model Craftsman Magazine.  Basically it's a cardboard box with cut outs and tissue paper applied. The light fixtures are clamp on units from the hardware section at Lowes.  For bulbs I used LED's.  I can't remember what Kelvin, but I purchased them to match a White Balance setting available in my Camera.  Total cost was around $50.  I took these blog pictures with my iphone.  I've taken a bunch with my camera but couldn't remember where the cord was last night to download them to my computer.  The photo box really helps in taking higher quality photos.  My son loves taking photos and he spent a hour or two doing just that on the weekend.  I'll share some of his work in a future post, when I track down that cord..........


Monday, 11 September 2017

Grand Trunk Tool Car

My current project is another piece of rolling stock for a typical Grand Trunk (NEL) work Train.  Inspiration came from a picture I purchased from Bob's Photos at the New England RPM in Enfield a couple of years ago.  It's from 1971 and is taken at St.Albans Vermont. 


My friend and fellow modeller Pierre Oliver suggested scratch building the sides and ends from styrene car siding, and using Accurail's fish belly under frame.  Tichy Train Group work train doors, windows, and  wood boxcar doors make up the basic assembly.

Just need a roof then.  I could not find a suitable roof in my stash or on the internet.  I could substitute a different roof, but roof's are so visible on the layout, so I wanted to get it right.

 I put the project back in my stash and then about a year later by surprise Pierre presented me with a resin casting of the correct Murphy flat panel roof.  He had just purchased the masters for the line of Canadian prototype resin detail parts formally marketed by Sylvan scale models and this roof is one of the offerings.  Pierre's Yarmouth Model Works doesn't yet have these parts ready for market but I'm sure it wont be to long.

After a evening and an afternoon of modelling here is where I'm at.


It has my usual level of detail, K-brake and all associated rigging/plumbing, wire grabs, nbw's, laser cut running board and some rivets for the bolster connections to the side frames. The vents are from Grant Line and City Classics.

I painted the window frames and surrounding areas, before adding the window glazing and gluing on the roof.  I will now just mask off the window frames and paint the rest of the car.  I don't like just masking the glazing as pushing to hard can send it into the car while masking.  I learned that lesson on a previous project......

I'm not sure what the car actually was used for though.  Is it a tool car or something else?  The three roof vent stacks sure are interesting.  The label on the door in the prototype photo says "Flamable"  -  "keep lights and flames away".  Hopefully one the blog's reader will know?